
Pincushion Finishing - Part 1


When I finished my second pincushion I tested the directions I wrote up for the first one.  They were horrible!  So, the second time around I documented my progress.  It's such fun testing my own patterns.

The pincushion started out flat, stitched with a square plus sign shape.  It could also be rectangular, as long as the corners are an equal number of threads.

First is the creasing - both along the edges of the top of the box and at the bottom.  As you can see in the top photo, I also creased the corners.


Now, trim the linen to about an inch to inch and a half past the stitching.  Then, turn the pincushion face up and fold diagonally across the upper left corner.


With thread that matches the linen, go through the corner on the front and the back and come up two holes to the right on both sides.  The basting stitches are very important here but can be removed as you go.


Keep going along over two and under two (running stitch).  I had to check the front and back with each stitch to make sure both sides were aligned.  When you get to the far right, turn around and stitch back. 

(The picture I took here didn't turn out)

Once you get back to the start, tie a knot and end your thread.  You can now pop the corner around to make sure everything lined up.


Pop the corner back around and repeat for the next 3 corners.


Now, you can trim the excess linen from the corners.  I left just under a half inch.


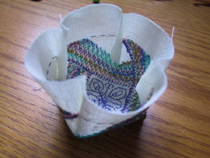
Now, turn the pincushion right side out.


For the next step, you need to measure the top of the pincushion and cut squares of quilt batting slightly smaller than the top.

To be continued tomorrow ...


Comments

Popular posts from this blog

It's about time - the big reveal

My bright quilt was finished in June but I wanted to wait until both were done before sharing the pictures.  Quilting the blue quilt didn't take long but finishing the binding sure did.  I did procrastinate a bit as it was too warm to have a huge quilt on my lap for most of the summer.  After this, I'll probably do all the binding on my sewing machine (and stick to smaller quilts). Notice the cut-out corners?  That was a challenge.  I found instructions here and it looked easy enough but I wished I had practiced some.  After a lot of finessing I finally got good miters but I could have done much better. The cut-out corners allow the quilt to hang nicely over the edges of the mattress and it's a perfect match for a full sized mattress.  But, the top edge isn't even close to the pillows.  I wonder how the quilt fit on the bed it was made for. Here, at last, is the original quilt that I was copying.   I just noticed - all of the baskets are

The last 2 blocks and the tops are done!

I needed 2 more blocks to finish the gray version of the quilt.  I ended up making simple 9 patch/half square triangle blocks.  One is the yellow block in the lower left. Here it is closer up.  When I made the half square triangles I had the red fabric going the wrong way so you are seeing the backside of the fabric.  So the red in the triangles is a little lighter than the red in the center.  It wasn't worth redoing. The other corner has a blue block and I managed to get the front of all the fabrics showing. So, here's what it looks like almost complete. And here's the blue version of the quilt. I've got the backing and the batting for the gray quilt (the backing is in the washer now) and I'm working on the thread to use for quilting and how to quilt it. They are too big for me to free-motion quilt.  I don't have the space.  As it is, quilting with the walking foot will be a challenge.  These tops deserve so

Basted

A few weeks ago I was at the Local Quilt store basting my bright sampler. It's been ready to go for a while.  I've been working on a baby quilt and it's now done.  It's been a while since I've quilted so I'm glad I had a quilt to warm up on. Next I need to pull a folding table out of the garage and re-arrange my quilting space.  This quilt will have a lot more drag than the baby quilt. I've also been looking at pictures of similar quilts looking for quilting pattern inspiration.  I'm thinking of taking the easy way out and u se wavy lines like this quilt . I should start quilting next weekend!